The No-Nonsense Guide to Buy a Camera for Landscape Photography

I took this photo with a second hand camera of €700,- It’s since been published in the coffee table book Wanderlust Alps.
Landscape photography is an expensive hobby.
Camera, lenses, accessories—when it comes to photography, almost everything costs a small fortune. But here’s the truth: gear isn’t everything. The best photographers rarely use the latest cameras or the most expensive lenses. In the end, I believe it’s all about skill, creativity, and dedication—not what’s in your camera bag.
As an experienced freelance photographer, I often get asked: “Which camera should I buy?” Honestly? There’s no one-size-fits-all answer. Everyone has different needs and budgets. That said, there are a few key things to consider—so in this blog, I’ll walk you through the essential features to look for in a camera and lens setup for landscape photography.
1. Weather Sealing: Trust Your Gear

Fall colours in a snow storm in the Dolomites. Despite getting soaked both my camera and lens remained operational throughout the day.
From dusty trails to sleet and snow, your gear needs to keep up. A camera without weather sealing is a no-go for me.
Keep in mind: weather sealing means your camera is splash-proof, not fully waterproof. And for it to actually work, your lenses need to be weather sealed too.
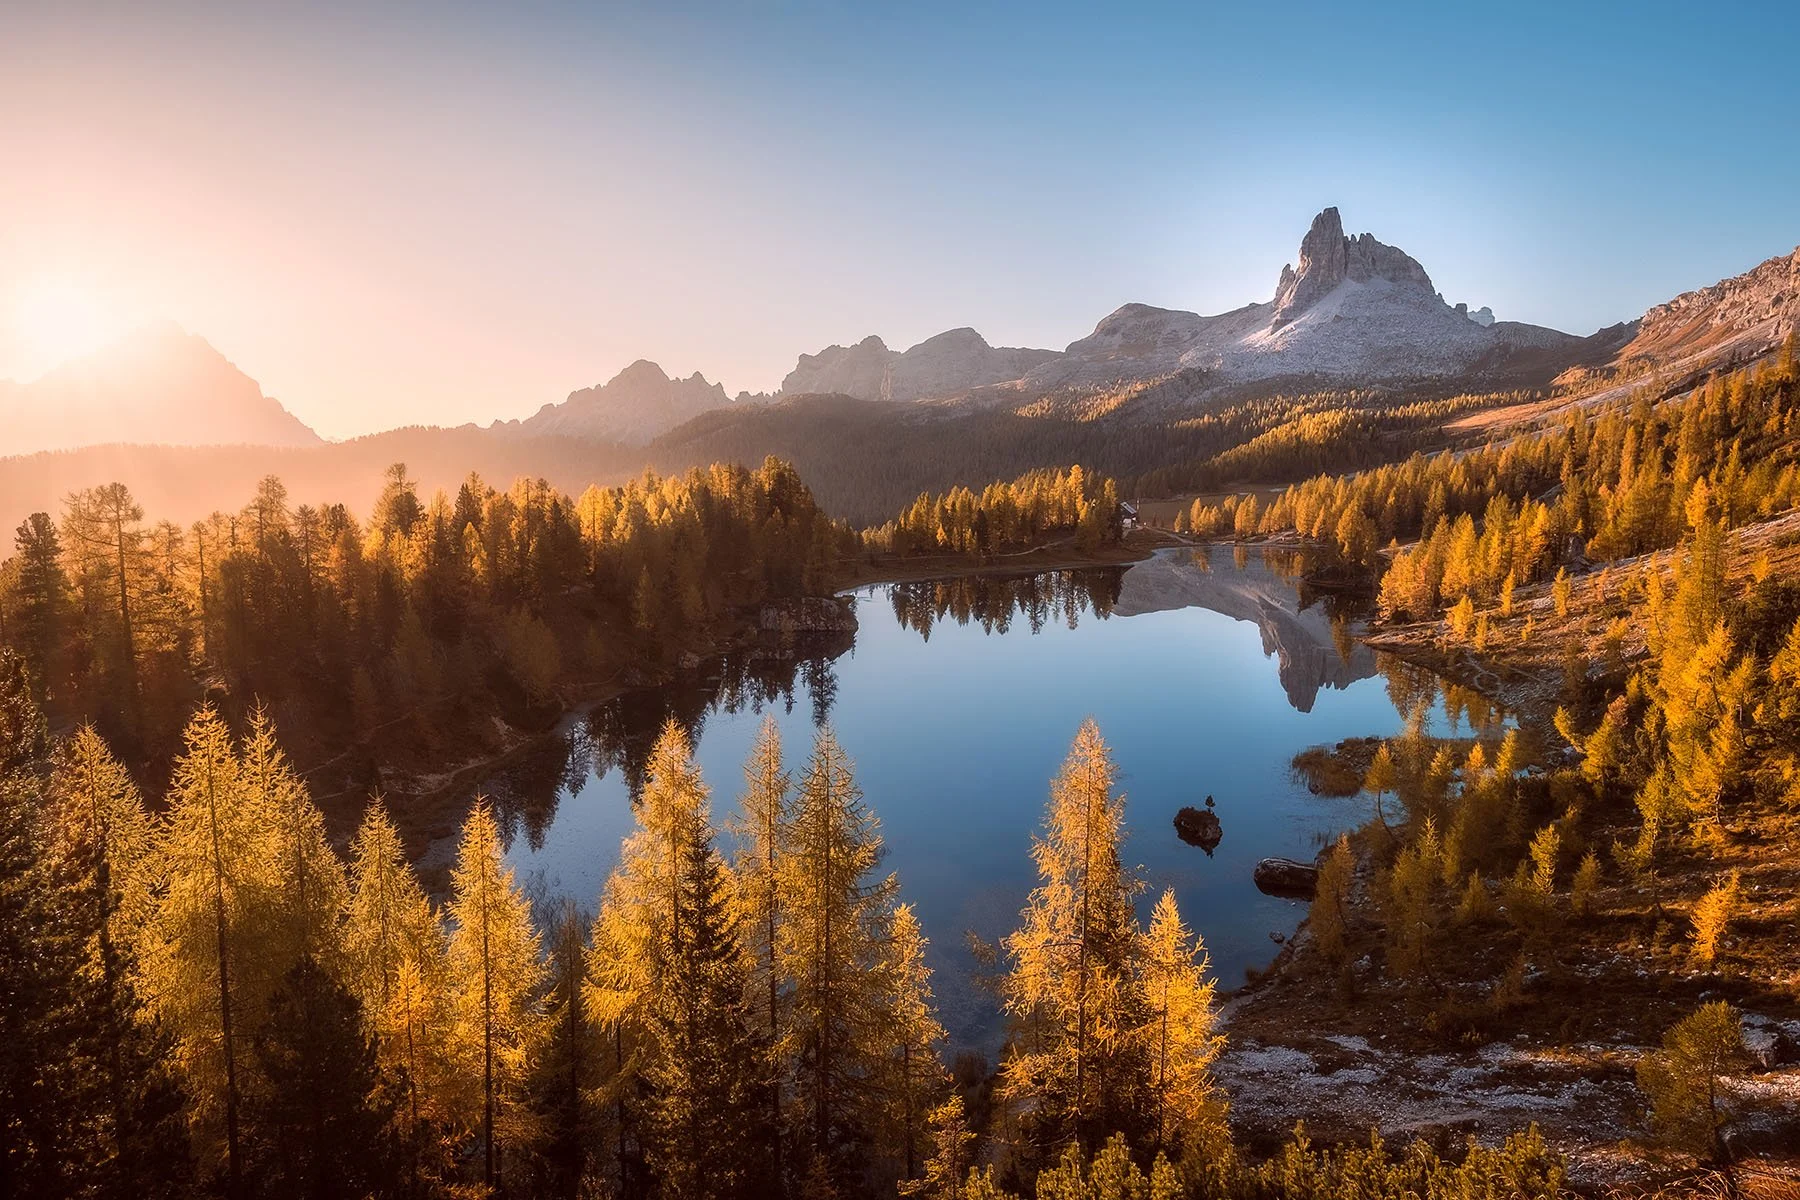
2. Dynamic Range: Capture the Full Scene

The dynamic range of my camera was just enough here to capture the details in both the clouds and the shadows.
Dynamic range is the range of contrast a camera can capture. The higher the range, the more detail you capture in both shadows and highlights.
It’s measured in “stops”—each stop doubling or halving the amount of light. A camera with at least 10 stops of dynamic range is what I recommend. High-end models can offer 12 or more, while entry-level ones might be limited to just 9 stops. That difference is noticeable, especially in high-contrast scenes. The good news is that most new cameras on the market right now have well over 10 stops of dynamic range, even the budget friendly ones.
3. Exposure Bracketing: Expand Your Possibilities
Thanks to exposure bracketing, I was able to capture details in both the deep shadows and the bright areas of my photo during sunrise.
Sometimes, the contrast in your scene is just too extreme—even for an expensive, high dynamic range sensor. That’s where exposure bracketing comes in.
I usually shoot three exposures: one underexposed (for the highlights), one normal, and one overexposed (for the shadows). Later, I blend them in Lightroom to reveal all the details.
Many cameras include a built-in exposure bracketing mode—this saves you from having to change settings between shots. I use it all the time. For me, auto exposure bracketing is a must-have.
4. In-Body Image Stabilization (IBIS): Shoot Handheld

It was impossible to set up a tripod here, so a handheld exposure was the only option.
I’m one of those photographers who likes to shoot from their hands, not a tripod. Sometimes it’s because I want to move quickly, other times because the wind makes a tripod useless. And sometimes the ground underfoot is not suitable for tripods. That’s when IBIS (in body image stabilization) becomes your best friend.
Modern IBIS lets you shoot longer exposures or brackets handheld—and still come home with tack sharp images.
🌄 Join Me on a Photo Tour in the Alps

Join me on my photo tours to photograph places like these!
If these photos inspire you, why not take the next step and experience the Alps through your own lens?
On my all-inclusive photo tours, I’ll take you to my favourite hidden gems and classic viewpoints, all while teaching you everything I know about landscape photography. Thanks to my local knowledge and years of experience, you'll be in the right place at the right time—with the right composition.
🏞️ What to Expect:
✅ Stay in epic hotels and remote mountain huts, just steps away from stunning photo opportunities
✅ Discover underrated and off-the-map locations for truly unique compositions
✅ Learn how to master composition, lens selection, and light in real-world conditions
Whether you're a beginner or a seasoned shooter, these tours are designed to take your photography to the next level—while enjoying unforgettable views and alpine adventures.
5. Weight and Size: Don’t Break Your Back

The viewpoint from the top of Skierfe along the Kungsleden in northern Sweden can only be reached by a two-day hike. During my trek on the Kungsleden, I walked a total of 440 kilometers with my camera in my backpack.
I often hike into remote areas, high up in the mountains. If I’m carrying gear on my back for hours or even days, weight and size really matter.
I’m even willing to compromise slightly on dynamic range to save weight. When shopping, don’t just look at the weight of the camera body—lenses often weigh more and make the bigger difference in your backpack.
6. Megapixels: Don’t Stress It

I once printed this photo for a banner over two meters tall. Everyone assumed it was taken with an expensive camera with at least 50 megapixels. In reality, I shot it with a second-hand camera with 24 megapixels.
You don’t need 50 megapixels to shoot stunning landscapes. In my experience, anything above 20 megapixels is more than enough—even for large prints.
Personally, I use 24 and 26 MP cameras. I’d avoid anything under 20, but beyond that, you’re golden.
7. Lens Selection: The Secret to Great Shots

A good lens brings out the details, colors, and contrast of the landscape. Lenses often outlast camera bodies, so quality glass is well worth the investment.
Your camera is only half the story. Good lenses are essential. So before committing to a system, check which lenses are available.
Some brands offer interesting, budget friendly cameras, but the lens options are limited. When looking at the lens line-up of a particular system, be sure to check for:
Optical image stabilization (OIS)
Weather sealing
Great image quality at f/8
Small size and low weight
These features can make a big difference in real-world use.